Showing posts with label organization. Show all posts

Thursday, August 3, 2023

Classroom Progress, maybe?

I just spent most of the day working in my classroom - thankfully the a/c was working today because this afternoon's high was 105!  

I honestly couldn't tell you what all I accomplished today - it feels like nothing major but I spent 6 hours up there.  I got a few organizational things done - new labels, etc.

One thing on my to-do list was to put up our Welcome board in the hallway.  For the past couple of years, we've had red bulletin board paper and I made the executive decision to change it out to red fabric.  If you've never used fabric on your bulletin boards, I encourage you to fix that now!  This is just a generic broadcloth, but fabric doesn't fade, stores easily for reuse, and doesn't show wear and tear.


Look at how bold the red fabric looks compared to the paper!  I also purchased some cute reversible border at Hobby Lobby with their 40% off classroom sale and you just can't go wrong with buffalo check.  I know the Cardinals part is crooked and normally that would bother me, but this board is at the end of the hallway and I probably won't see it again until it's time to change it in September!

Back in my classroom, I piddled with several small things that needed to be done and then tackled 2 bigger projects...

The first project I worked on was assembling this organizer from Amazon.  Last week, when I was working in my room, I started thinking about how I could better use some of my space to organize random supplies for students.  My previous use was a mishmash of boxes and locations and it just wasn't very cohesive.  I played around with some letter trays but nothing quite fit what I wanted.  

(Note:  I totally forgot to take a photo of this in my classroom - sorry about that!)  Once I had it assembled, I started to organize student supplies.  The bottom drawer is where students can get rolls of tape and glue sticks for their table buckets, the bottom shelf will be a place for scratch paper and the top shelf will hold my patty paper box.  The vertical storage space behind fits my graphing whiteboards perfectly since we don't use those very often.  For now, I have left off the pencil cup but it's magnetic and might end up on the whiteboard eventually.  

The other goal today was to change out my Puzzle Place area but that didn't quite work out the way I was expecting.  

The little woven bowl I found while cleaning at home did end up working perfectly for the fidget toys (fake Rubik type stuff from Target Dollar Spot), but then I had a whiteboard dilemma!  

Last week, I had decided I wanted to change out the Puzzle Place to something to encourage more interaction with the board.  I had used the same 4 quadrants for the past couple of years and the only one the kids really enjoyed was the Math Joke.  As a result, I decided to look for an inexpensive magnetic solution in order to do some vertical puzzles (inspired by Sarah at MathEqualsLove) and found this whiteboard at Hobby Lobby for $7.99.  (Note:  I was so impressed with the Hobby Lobby whiteboard that I went by there on my way home to get another one for the hallway (inspired by Sara Vanderwerf) but they were sold out.)

Once I go to school, I realized that I wasn't super sure which side of the board I wanted to put the whiteboard on!  

I plan to keep the Math Joke and the other one will probably end up either being the Math Fun Fact or will get changed to another brain teaser (like Set, 24, solvemoji, etc - something that is less manipulative than the typical puzzle table problem)

When I look around my classroom, I can't say that I can account very well for the 5 hours I worked, but at least it's done enough until I officially report on Monday!  

Tuesday, August 1, 2023

My Teacher Binder - 2023/24 Edition

Hey folks!  It's August 1 and that means that school is just around the corner.  I officially report next Monday and kids come next Thursday, but I am definitely not ready for summer to end this year!  I mean, if I'm being honest, I'm never really ready for summer to end.  I like the structure of school, but I don't like wearing shoes and having to people :)

This summer has been a summer of cleaning, organizing, and purging, which my house sorely needed!  We have one more load of stuff to take to the donation center and then my attention can fully shift to the new school year.  I did go up to my classroom last Thursday to get it mostly put together and to start working on my to-do list.  

One of the things on my to-do list was to put together this year's Teacher Binder and I realized last night that I never shared last year's binder - oops!  I have this year's made and printed, but I still need to assemble it.

Cover and Binding:

A few years ago, I ran across these pocket folders at Dollar Tree that were fairly heavy weight and with a customizable cover.  I haven't seen them in the stores this year, so it's possible they aren't carrying them this season, but I've only been to my Dollar Tree, which isn't in my favorite Top 10 stores if that tells you anything!  

For binding, I have been a huge fan of the DiscBound systems for many years - starting with the Arc system at Staples, but you can also find them with Happy Planner at various craft stores, TUL at Office Depot, etc.  I have found the 1 inch disc work the best for me, but the discs come in a variety of sizes. 

My cover and the dividers inside are all normal 3-hole systems, so I just cut the folder in half, then punch all of them (one at a time of course) using my disc bound punch.  I've used a variety of things for my dividers over the years, but this year, it's just a plain set of plastic pocket dividers that were on Prime Day sale :)  

Inside the Binder:
I typically have 6 or so dividers in use - The first 3 are for my calendars:

Monthly Calendar - this is a typical Monthly spread with a place to jot down reminders and notes under each Month.  This is where I tend to put long-term appointments and due dates.

Quarterly Calendar - This view only shows the first semester of Geometry, but these are just pacing type calendars for me to plan out the quarter.  I also put down holidays and breaks if they are known.

Weekly Calendar - This is my page with all of the day to day details.  On the left side is a place for me to put things for before / during / after the day, such as Lunch Duty, IEP Meetings, covering a class, etc.  Below each day is a checklist for daily habits like posting to Google Classroom, exercising, etc.  In the big empty space is a place for general notes and to-do lists and this space usually has a post-it note or two adhered :)

After the 3 sections of calendars come the sections for my gradebook and things like that, but since I don't have my class lists yet, those aren't ready for the binder!

What does your teacher binder look like?


Monday, January 2, 2023

#Made4Math - Daily Habit Tracker


Happy Monday, y'all!!

It's a new year and like many people, I'm wanting to work on better habits in 2023.  I was talking to hubby last night about keeping track of habits and having a better way to monitor how I'm doing.  I know there are a ton of habit tracker apps, but I wanted something simple.

Then, on my way to work this morning (yes - I had to report to work today!), I remembered that I had incorporated a Habit Tracker into my Teacher Planner several years ago, but then as the Teacher Planner evolved, the Habit Tracker went away for some reason.

Obviously, I didn't want to recreate the wheel and I certainly don't want to remake my Teacher Planner halfway through the year, so I decided on a half-sheet bookmark style habit tracker for my planner.  Since my planner is always open on my desk, I could easily see the month and since I use a disc-bound planner, I could move it from week to week easily.  

I gave myself 10 columns for tracking habits - everything from Exercise to Blogging to updating Google Classroom.  

What habits do you track?  What method works best for you?


If you want a copy of the PDF - click here!


Saturday, August 13, 2022

Organizing my Teacher Binder - #MTBoSBlaugust Day 13


I had planned to blog the past two days, but Thursday was our first day back with students, so I've been exhausted!  By the end of Thursday, my feet were killing me and my throat was raw from talking.  Even today has been busy with lesson planning, so I almost forgot again today!

This morning, I had several things on my to-do list - setting up my online Gradebook, syncing with Google Classroom, and printing my attendance sheets.  I'm one of those old-school teachers that really does better with paper versus electronic methods, so I like having paper records for Attendance and other things.

One of my items today was working on my Teacher Binder.  I typically blog about my Lesson Planner, but it didn't change much this year other than I'm having to use a full size planner instead of the Junior Planner since I'm teaching 3 preps this year.

But one of the most useful things in my Binder are my Class Rosters.  I downloaded my class lists today as spreadsheets, then copied the names over to my Class Roll Sheets (seen at the left).  I use these for...

Gradebook Sheets - Years ago, I used to use the Whaley paper gradebook, but now I have a section in my Teacher Binder where I have these blank rosters to record quizzes and test grades or as a general checklist if needed.  I typically have a back-up copy ready to go in case I run out of columns and need to move to a new page.

Eligibility Tracking - In another section of my Teacher Binder, I have a copy of each roster for tracking eligibility over the semester.  I make a special effort to reach out these kiddos and their parents, asking them to come in to retake a test or whatever the situation might be.  I typically put a code of "E" for email, SC for student conference, etc during that week to document my contact.

Parent Contact - Another section of my Teacher Binder is where I track Parent Contact.  I label the first few columns for the big contact items - like the Back to School Google Form, Back to School Night,  Parent Teacher Conferences, plus I also document the date and type of contact for any emails or phone calls I make.  My goal is to have a positive parent contact for every parent on my roster throughout the year.  

I'm sure there are other uses for this form as well, but those are three I find very helpful in keeping me organized!


If you are interested in joining in the #MTBoSBlaugust fun, here's a post with some prompts to help you out!  The idea is just to blog / micro-blog during August to help us focus and reflect on the year ahead.  Please tag your post on Social Media with the hashtag #MTBoSBlaugust so we can support you in your blogging journey!


Sunday, August 7, 2022

Organizing Activities - #MTBoSBlaugust - Day 7


Today is the last day of summer!  I'm definitely not ready for this one to go yet.  Typically, I spend a good chunk of my summer outside reading, but we've had a huge heat wave this year, including 100+ degree days in June, which is NOT typical.  I think July ended up with over 20 days of triple digit heat, so this has been a summer where I've stayed indoors, shades drawn, and lots of fans & ac!

But whether I'm ready or not, tomorrow morning will come and it will be time to report for my 25th year of teaching.  Holy moly, that seems crazy to me!  25 years!  What?!?!

Over those 25 years, I've amassed a LOT of stuff.  My room has a lot of storage, but not enough - I still have boxes in my garage from when I moved to my new school last year.  I had hoped to go through them this summer, but the heat had other plans. :)

This photo is HALF of my Geometry cabinet.  Last year I had 4 sections of on-level Geometry and 2 sections of Honors Geometry.  This year, I have 2 sections of on-level and 3 of Honors.  I really like doing activities as much as I can, so I have a ton of card sorts, files, manipulatives, etc.  Here, you can see several of the card based activities on the top shelf and manipulatives on the bottom shelf - Rules, Protractors, Measuring Tapes, Ang Legs, etc.  What you don't see is there's also a file crate on the bottom right that holds all of my hanging file activities for Geometry - around the room activities, class sets of Open Middle problems, etc.  To be honest, I have more stuff than I know what to do with!  

One of my summer goals was to organize everything and make a list of what all I had in the cabinet so that I wouldn't forget to actually USE the various activities I have accumulated over the years.

This task seemed easier said than done... I thought about a list in my lesson planner or in my binder of master copies, but I discarded those ideas because I probably wouldn't LOOK at the list once I made it.

Then, yesterday morning, I had a thought!!  (Yeah, those sometimes happen!)

When planning lessons, I tend to use last year's Interactive Notebook (INB) to help me think about what I liked and didn't like about a lesson and jot "notes to my future forgetful self" about what to change.  What if I made a list of activities and had it in my INB to refer to while planning?  YES!  This could work!

So I quickly made a half-sheet template with my units listed at the top and a 2-column paper so I could track the type / location of the resource (file, cards, open middle, Desmos, etc) and the title of the resource.  After printing it off, I sat down with my very un-organized list of resources and wrote down each one on the correct unit sheet.  The sheets are double-sided so I can add new resources as I find / make them this year and will be easy to move from notebook to notebook as years progress.

It only took me until the weekend before school started to figure out this problem that has been nagging me for a year, but better late than never, right? :)


If you are interested in joining in the #MTBoSBlaugust fun, here's a post with some prompts to help you out!  The idea is just to blog / micro-blog during August to help us focus and reflect on the year ahead.  Please tag your post on Social Media with the hashtag #MTBoSBlaugust so we can support you in your blogging journey!


Saturday, August 6, 2022

Email Templates - #MTBoSBlaugust Day 6


Do you ever have one of those moments where you wake up in the middle of the night with an idea that you think is brilliant?  Sometimes the ideas really are... sometimes not... and sometimes you can't even remember them in the morning!

Today's idea came to me this morning as I was laying in bed reading and I truly had one of those "why have I never thought of this before?!?!" moments! 

Okay - so here's my idea... Email Templates!

I like to communicate with my students and their parents on a regular basis, so I utilize our gradebook Mass Email option a lot.  But until this morning, I had never thought of capturing those emails as templates to use over and over again instead of reinventing the wheel each time!

So once I sat down at my computer this morning, I went to Google Drive and started a new folder called Email Templates.  Then I made Google Docs for each of the emails that I would send throughout the year.  Finally, I went through last year's Sent Email box and copied the emails to paste into the G-Doc.  Thankfully this didn't take forever because I've only been at my school for one year! :)

As I use each one of these emails, I can edit in Google Docs, then copy/paste into our Gradebook Mass Email system!  

Hopefully this will save me some time this year.  One of the comments that I received multiple times in May from parents was how much they really appreciated the constant communication as teenagers are not always the best at telling their parents about upcoming events!  I'm sure there are others who were annoyed by my emails, but if it helps just one student, then it's worth it!


If you are interested in joining in the #MTBoSBlaugust fun, here's a post with some prompts to help you out!  The idea is just to blog / micro-blog during August to help us focus and reflect on the year ahead.  Please tag your post on Social Media with the hashtag #MTBoSBlaugust so we can support you in your blogging journey!

Monday, August 9, 2021

#Made4Math - Birthday Pencils and Planner


It's my last Monday of summer, y'all!!!  How in the world does July go so fast?!?!

I'm changing schools this year, so I officially report on Friday for new teacher orientation and I'm so not ready for school!  My room is mostly done, but I have yet to even think about lesson plans!  Part of that is I don't know yet what the COVID protocols will be for this school year - will I be able to get back to group work?  Using my INBs?  Just so much unknown.  But I did get a chance to meet the rest of my department last week, so that was fun!  I am excited about the change and to try something new.

Since this is my last Monday of summer, I have soooooo much on my to-do list and very little is actually ready to show you, but here we go...

In case you are new to #Made4Math, it is a weekly blog challenge to share a project or creation for your classroom.  I love reading your posts, so please join in the fun using the hashtag #Made4Math on Twitter, IG, or blogging about your project. 


Here are last week's posts in case you missed them:

Farica (@Nerd_QED) shared about a lesson plan revamp

Jane (@extraneousroot) shared about assessments and math songs

Elissa (@misscalcul8) shared some photos of her classroom revamp

I shared an update on my Play Table and a few new puzzles to print

We would love for you to join in the #Made4Math fun - Post your creations on Twitter, blog, or IG with the hashtag #Made4Math!

Now on to this week's projects!

Project #1 - Birthday Pencils

In early July, I found these pencils in the Target Dollar Spot and I just LOVED their positive affirmations! I honestly have no idea how many students I have this year, but I quickly purchased all of the packs that I could find.

I've always been really bad at the whole birthday thing, but going to a new school, I really want to try harder this year to recognize student birthdays and I thought these pencils might just do the trick! I pulled up my trusty PowerPoint, made a few shapes, added some free clipart and a cute font and I was on my way!

I made 6 flags per page, printed them out on various colors of paper and then I'll cut them out, snip a spot near the top and poke the pencil through!  I've not cut them all out yet because my pencils are at school and I really don't want to transport hundreds of little flags - I have made an example here for you though! 

On my first try, I decided to use a hole punch to make holes, but the snipped lines were easier and worked better, so snipped lines it is :)

If you want a copy of the Happy Birthday flags, click here to download a PDF.


Project #2 - Lesson Planner

This project isn't quite complete, but I'm working on it!  If you've been around for a while, you know that I love making my own planner for the year.  Last year was the first time I tried using a Junior sized planner and I found out that I LOVED it!

Here are some previous posts on the planner:
- Junior Planner Reflection

With the return to school, I need to get my act together, so I've started working on my planner...

One thing that I love doing is making my own covers out of plastic pocket folders.  Here, you will see that I cut down a blue / silver folder from Dollar General and I'm using pink discs and pink cardstock for my dividers (not pictured).  I LOVE discbound notebooks and if you've never tried one, I HIGHLY recommend that you give it a shot!

Here's a copy of the 2021-2022 monthly calendars if you want your own - print them two to a page, flip on short edge, cut them apart and use the Junior size on your punch to make your calendar!  The rest of my planner won't change much, so you can use the links in the posts above if you want to make your own planner!


Okay, that's it for me today... Until next time, keep creating and sharing!


Friday, January 1, 2021

#MTBoSYuleBlog - Planning Away


What is the Yule Blog Challenge?  Over Winter Break, I'm going to attempt to blog 12 times, sharing reflections of 2020 and what I'm looking forward to in 2021.  I would love for you to join in the blogging fun - read more about the challenge by clicking here!

My 2020-2021 Planner

Several social media posts this morning have been about buying new planners.  For me, I don't keep a separate personal vs school planner, so I tend to think of new planner ideas in the summer, not during January.  But a few days ago, I tweeted this:


For several years, I have kept my lesson / personal planner and gradebook together.  However, with the craziness of this year, I honestly didn't know what to expect, so I decided to separate them and make my planner into a junior planner and keep my gradebook separate.

While I'm not sure if I love the gradebook separate, I do love the junior planner!  When Hedge asked me to tell her more, I shared a photo, then decided I should share some more here...


A Junior Planner is the size of a half-sheet of paper, so 8.5 x 5.5.  The post-it pad is there for size reference - it's a typical 3x3 note size.  I designed my planner in PPT and then printed double sided.  Typically I take my planner to Staples to print on heavier paper, but again, when the year started, we didn't know what to expect and I didn't want to put a ton of money into a planner I didn't use, so I just printed on a normal laser printer.  The cover is a heavier plastic that I had found in the Staples clearance bin YEARS ago, but you could easily make your own using laminated card stock or by cutting down a folder (plastic or cardboard).  I am a huge fan of disc-bound notebooks and these are standard 1" discs.

The dividers are just printed on card stock and I've shared them before (see this post)

You'll notice the tabs say Calendar, Lesson Plans, AP Statistics, FSDA, Blog / Tech, and Other.  Let's start with the calendar type pages...


Under the "Calendar" tab is the traditional monthly calendar.  This is more of an "at-a-glance" for the month.  The "Lesson Plans" tab is a bit messier.  I shared this layout earlier this summer and I really like it!  There are a few changes I would maybe make depending on how the year played out, but for now, it's allowed me to keep up with the weekly lesson, schedule for any meetings, reminders for things like #MathTeachCollab, and lots of space for my Notes / To-Do List.  This is definitely a working space, so I shared some of my mess with you :)

The AP Stat / FSDA tabs are based on an idea from my friend Rachel, who blogs over at Purple Pronto Pups.  Click here to see her post about her "Summer Notebook" 

For the most part, those two sections are just notebook pages, with subtitles for "General" and each chapter / section of content.  This is a place where I can jot down ideas when I'm browsing the internet, thoughts that just come to me about various topics, articles, etc.  This is super helpful for lesson planning!

The "Blog / Tech" tab is just a place to keep track of blogging ideas and EdTech ideas


Definite shout-out here to two other good friends - Rebecka and Sarah - I am so very blessed to have these two women in my life and can't wait until we can have lunch together again!  (Sidenote - our last lunch date was scheduled for March 16 during our Spring Break, but we all know what happened with lockdowns in March 2020....)

Sarah (of Math Equals Love) shared this summer the idea of a visual blogging calendar and I LOVED the idea!  She's totally right in the idea of stickers make a difference...  Hopefully it will help me in 2021 to keep up with blogging :)

On the left side is a goal of mine to keep track of "One Good Thing" - Rebecka posts daily over on the OGT blog and she also challenges her students to keep a running list in the back of their notebook.  You'll notice I didn't really start this until the #MTBoSYuleBlog challenge though... LOL

The last tab is just for other notes and it just has blank paper over here.  I've thought about adding my Meeting Notes to this section, but that's a thought for another day... :)


If you want to make your own Junior Planner, click here to download copies of the files I mentioned above


Sunday, August 23, 2020

#MTBoSBlaugust - Lesson Planning in a Pandemic


School starts tomorrow, y'all!!

But it's going to be so weird.  I don't have a pretty new outfit, I won't be helping lost kiddos find their classroom, I won't have tired feet at the end of the day.

But I'm really excited to finally get the first day over!

That sounds weird, I know...  But this whole year has been weird.

For weeks (months?), I've fretted about the first day.  I've changed my lesson plans so many times.  For the first time in probably 10 years, I'm not doing my standard killer nurse lesson for day 1.  My lesson plans have been written on scrap pieces of paper and sticky notes.  I've copied and pasted more Desmos screens than I can keep up with.  I've fought and wrestled with "analysis paralysis" more than I care to admit.

But it's done.

Tomorrow, ready or not, those kiddos will show up in my Google Meet and we'll tackle this thing together!

Our schedule is a mix of synchronous (live) sessions via G-Meet and asynchronous (on your own) lessons.  It really took me quite a while to wrap my head around what this would look like and I'm still not sure I have it completely figured out, but either way, we're going live tomorrow and praying the wi-fi holds up 😁

In the midst of all of today's chaos with figuring out my lessons, I decided I didn't like how the previous lesson planner was working out, so I created a new one.  I already like it much better than the first version!

Here's the revised version of the Junior Planner:
  • The lesson plans are all on the right side and not split over the middle "spine"
  • Plenty of room for my current scribbles / sticky-notes on the left side.
  • Still allows me to do an appointment scheduler for an "at a glance" look at my week.
  • I currently don't have room for an Advisory area, but the Sat/Sun could be subbed in for Advisory if needed.
  • Overall cleaner feel.

My planner is already filled out for this week and based on what I've written down, it's going to be super busy!!  I still need to finish the actual lessons for Thursday/Friday, but I'm ready for at least the first 3 days (I think) 

Wish me luck! LOL

Friday, August 7, 2020

#MTBoSBlaugust - Junior Lesson Planner


August has already been a month and we're only a week into it!  But like so many of us, I need to really work on giving myself grace and being okay with whatever happens, happens. Yesterday was one of those days.  I had all plans of blogging, but as the day went on, it just didn't happen.  

But that's okay!  Maybe I'll hit some inspiration that gives me two blog posts today, but maybe not :)

However, I did finally come up with a potential Lesson Planner format that I think I like.

To be honest, I really liked my planner last year and it was GREAT for in-person classes.  But we aren't starting in person, so I need a slightly different format.  I need a way to track my lesson plans, but also the random Google Meet times, office hours, etc.  I've never really had an "hourly" tracker in the past, so this is a new need for my planner.

Typically, I do my lesson planner in a regular paper sized format of 8.5x11, because I keep track of my lesson plans and gradebook all in one Arc notebook.  However, I'm still trying to figure out the grades, etc, so I decided to try a Junior Lesson Planner format.  This is my first draft and I've never kept my first draft, but I wanted to share for feedback...
It's again printed landscape on 8.5x11 paper so that it can be cut apart for the Junior notebook.  I haven't really tested it out yet, but thought I'd share for anyone that might be looking for a simple lesson planner :)

Click here to get the file:  Junior Lesson Planner
Click here to get the font:  KG Do You Love Me

Wednesday, August 5, 2020

#MTBoSBlaugust - Junior Calendar


It's time to get serious about this planning thing, y'all!

Our district decided on Monday night to start back in distance learning until the numbers decline in our county.  I know it was a really tough decision and honestly, it was a no-win situation as there wasn't a decision would make everyone happy.  However, that means I really need to get myself into gear because teachers report back next week and I've gotten nothing physically done for school! Eeeekkkk!

So today, I decided to start with some planning and organization :)

This summer, I decided to try a Junior Arc Notebook for my summer notebook.  I had purchaed some Junior Arc covers a few years ago at Staples on clearance for 50 cents and had never used them, so there's no time like the present, right? :)  

A few definitions might be needed here:

The Arc System is the discbound notebook system that can be found at Staples.  There are other discbound systems as well, such as the Happy Planner, but they all pretty much work the same.  I LOVE discbound notebooks as they are so simple for inserting and taking out pages.  It works like a 3-ring binder, but with the ease of a spiral notebook.  Best of both worlds! :)

The Junior notebook is for half size pages, so if you take a regular 8.5x11 page in landscape format and cut it in half, you now have a Junior notebook.  

A Summer notebook is an idea I borrowed from my dear friend Rachel and you can read more about it on her blog, but the idea is to have a place to jot down ideas that you run across during the summer.  I've used this idea for the past few summers, but once school started, I often forgot to reference those ideas I had recorded!  So, that moves us on to....

Merging my summer notebook and my teacher planner!


This is still very much a work in progress, but I got my monthly calendars done today!  I'm waiting to do the weekly lesson planning pages until I have a bit more information about what this year will look like, but I wanted to share the monthly pages with you! :)  During the summer, my weekly calendar was more of a way to keep track of appointments, so I'll share that too :)

The dividers are printed on cardstock and there are 6 dividers - Calendar, To Do List, AP Stat, Forensics, Technology, and Other Notes

Behind the other dividers are just half-page note sheets.  For my courses, each page has a title with chapter so that I can file ideas on the appropriate chapter page.

Here are the files if you want them:
Monthly Calendar - will need KG Payphone font


Tuesday, April 14, 2020

Remote Learning - Organization is Key!

Week 2 of Remote Learning has started and my new co-workers are some of the laziest colleagues I've ever had!  Either they are laying down on the job, napping, or trying to steal my office supplies.  Actually, it's the office supplies that are most annoying - those are MY pens! :)

This has been a HUGE adjustment for me.  Not being able to see my students to see if they get it, to watch them work on whiteboards, to check in with them about their lives, to give High Fives... this is hard.

I don't mean that it's hard in the sense of being at home - that part doesn't bother me.  I'm a huge introvert by nature and can do just fine with just a good book, a blanket, and my patio. My office is a comfortable place to work and I have a very walk-able neighborhood to get out for fresh air.

No - the hardest part is just the paperwork.  I've actually really enjoyed having the time to learn more about Desmos, provide individual feedback on our activities, and exploring some tech tools that I can use moving forward.  But the hardest part has been just the daily organization of teaching this way... keeping track of the daily communication with students and parents, monitoring who has done the assignments, contacting students and parents you haven't heard from.  It's a full time job just to keep up with the emails!


Keeping my Sanity through Organization


Organization Tip #1 - Color Code Everything!
I am always up for colored pens, but earlier this year, I got a set of erasable pens from Amazon and I love them.  I have had the Frixion pens before as well, but I kind of prefer the off brand ones :)  I keep track of when I've contacted a student, parent, counselor, when a student has contacted me, who has done what assignment, etc.  The best part of the eraseable set is when I'm doing my lesson plans, I can erase and fix errors! :)  Yay!


Organization Tip #2 - Tracking Student Work
I keep a paper attendance book that shows a whole 9 week period in my classroom normally, so I just printed those out and checkmark each day.  I also keep track by colored dots when I have contacted students / parents, sent out whole class emails, etc.  Mainly, I need to be able to see at a glance when I haven't heard from a student in several days so a "welfare check" can be done, either via email or phone call. 

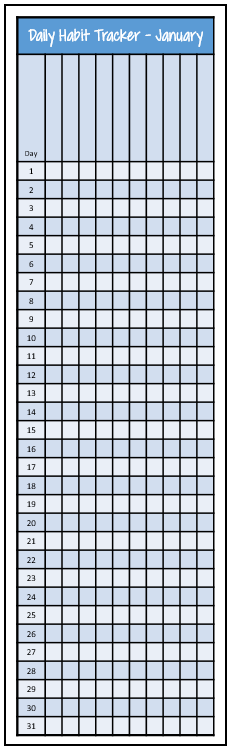
I also struggled with keeping track of what I actually assigned each day, comments of changes that I wanted to make for future use, and how many students had done each assignment, so I made a mini-calendar at the left to help me keep track.  Right now, each day tends to just melt into the next one, so having a way to keep track of day-to-day lessons, which ones I had given feedback on, and a place to make myself notes was a must.


Organization Tip #3 - Tracking Parent Communication
While I'm trying my best to have engaging lesson plans, I know that I will not have 100% engagement.  However, I was quickly getting overwhelmed by the emails I was sending and tracking who had contacted me.  We are supposed to contact parents (or send names to the counselor) when we have not heard from a student in several days.  Plus, there are some students who are starting to trickle in with "Yeah, I'm good with my grade.. stop nagging me already." and in those cases, I really need to make sure I have the documentation from their parents that the parent is okay with the student's decision.  In general, I'm just drowning in emails and I needed a way to keep track of it all :)


Organization Tip #4 - Lesson Plan Binder
In my AP class, we are still working toward our AP Exam, now scheduled for late May, plus I still have one more chapter to teach.  Because I want my students to continue with their AP Stat notebook, I created a Digital Learning Notebook for them that has the daily lesson plan, notes sheets, problem sets, and AP Free Response problems.  I also try to give them feedback daily so they know how they are doing and what they can do to improve.  I was quickly gathering a stack of answer keys, AP Rubrics, etc, so I grabbed a spare binder to make my own Digital Learning notebook / Lesson Plan Binder.  Each week, I have a general guide of what we are doing, then the weekly file that I share with the students with my answer keys to keep them all in the same place.  This has proven invaluable to me as we are asyncronous, so the responses may trickle in over the course of a few days.


Organization Tip #5 - Rocketbook still Rocks!
I've shared before about my love of Rocketbook in my classroom, but with the shift to Digital Learning, the structure of my lessons have changed a bit.  In my regular classroom, I use a composition book and half-sheets of paper, so it fits perfectly into an 8.5x11 Rocketbook Frame. Then I just snap a photo and it goes straight to Google Drive for students to check their work.

But with my Digital Learning, my notes / problem sets are on normal sized paper, so my Rocketbook Frame was too small!  EEKK!  I talked hubby into helping as I was busy working on other stuff and he was able to enlarge it to an 11x17 page.  Then I just laminated the frame and now it works perfectly with 8.5x11 notes.  Yay! :)


Organization Tip #6 - The Bookmarks Bar is your Friend!
One of the best organization tips that I have, that I use MULTIPLE times a day is a folder on my Bookmarks Bar.  This allows me quick access to the tools that I use every day.  For example, you'll notice links to resources that I've found useful, including links to the amazing webinars that have been going on right now to support teachers.  But the bottom set of bookmarks are the true workhorses of this tip.  I have easy access to my Google Meet, my Desmos lesson collections, and my Google Folders that organize other lesson plans and the district files.  I don't even want to think about how many times a day I click this link on my screen :)


My Biggest Take-Away:
There is no "right" way to do this Distance Learning thing.  Even as an organized person, I'm still struggling with keeping track of everything, but the tips above have definitely helped me keep my sanity and helped to tame the paper monster a bit.

What things have helped you keep organized during your shift to Distance Learning?

Monday, August 19, 2019

#MTBoSBlaugust - A Puzzle and Some Forms


This month, I am participating in a blogging challenge called #MTBoSBlaugust.  To read posts from other participants, click on the logo above.


Today was our last work day before kids come tomorrow!

To be honest, when I left on Friday, I was feeling pretty good.  Then I got to school day and it's like, "Wait, what??? Kids TOMORROW??" and my brain totally shut down and wigged out on me!

So instead of getting my lesson plans done (which I finally finished a whopping 10 minutes ago), I had a flurry of activity getting some forms and such for organizing purposes done. :)

M4M #1 - QBits Puzzle

As you know, I've been working on my puzzle table to make sure I have some fresh puzzles available for my returning students.

I ran across this puzzle last week in one of my Puzzle Books and it reminded me a lot of Panda Squares, so of course I had to type it up! :)

The idea is to put the 16 smaller squares into the grid so that matching colors touch along each side.

If you would like the file, click here


M4M #2 - Forms and More Forms
I'm a list maker... and a form maker... :)

If I can figure out a way to put something into an organized format, I probably will!

At the left, you can see my Student Aide To-Do list, a "Why were you Tardy" note, and a "Please put away your cell phone" note.  I realized after the fact that I should have made the cell phone note into a laminated paper so I could reuse them... Oh well. :)


Now it's time to head to bed... those kiddos will be there tomorrow!! :)  Have a great night all!


Wednesday, August 14, 2019

#MTBoSBlaugust - Rocketbook Hack


This month, I am participating in a blogging challenge called #MTBoSBlaugust.  To read posts from other participants, click on the logo above.


I LOVE a-ha moments!!! :)

This post might not make a ton of sense, but I wanted to share it with everyone since it's back to school time and this might be a hack that helps you out!

If you've not heard of Rocketbooks, it's a text to digital notebook where you can write on the notebook, color in a little circle at the bottom to choose a destination, snap a photo with the RB App and your notebook page gets sent to the folder automatically!

Hubby had actually purchased a RB notebook several years ago from the Kickstarter campaign, but I hadn't used it and honestly didn't see a ton of use for it until I read Julie's blog post about Rocketbook hacks.

Then my mind was racing! :)

This year, I had already planned to upload solutions to the daily practice problems but to be honest, taking photos (or scans), uploading them, etc was really more work than I wanted to deal with.

So here's my hack... :)

I took a printable Rocketbook page, cut out the inside part and laminated the frame.  I put it on top of a green piece of paper so you could see the frame since my table is white :)

Since it's laminated, I can use a whiteboard marker to color in the correct circle based on which course I'm working with.  That circle tells the app which Google Folder to save the scan to, then automatically uploads whatever is inside the black frame to that folder.  I just have to color the circle and scan using the app - it's that simple!

Now why in the word would I go to all this trouble??

Here's why...

And this is the BRILLANT part!!!

I just put my little laminated frame right ON TOP OF my INB and it will scan it!

OMG - is that not the coolest thing ever?????

#micdrop


Now I'm on a hunt to find out all of the RB hacks I can figure out!  What ideas do you have for this hack? :)

Monday, August 12, 2019

#Made4Math - Last Monday of Summer!


This month, I am participating in a blogging challenge called #MTBoSBlaugust.  To read posts from other participants, click on the logo above.


It's Monday again!!

Today is my last Monday of Summer 2019.  We officially report back on Wednesday and kids come next week.  As a result, I've been back and forth on trying to get things done versus trying to shut down and enjoy the last few days of break.  I am teaching the same preps this year, so I've not been extremely motivated on the lesson plan front, but I guess I probably should get on that soon! :)

But first, let's take a look at the pretties for this week! :)

Made4Math #1 - Sum It Up Puzzle

I've been trying to find some new puzzles for my puzzle table this summer.  While digging around in my stack of books, I found this series called Solve It that I had picked up years ago at Mardel.

While flipping through the book, I ran across this number puzzle that reminded me a lot of an Open Middle problem :)  Since I already have sets of 1 to 9 tiles, it was pretty simple just to make a page for the puzzle frame and a new puzzle is done! :)

If you want to download the file, click here


Made4Math #2 - Notes from the Teacher

Last spring, I ran across this tweet from Emily DeLuca about writing 4 notes per day to her students.  I loved the idea, but just didn't follow through with it.

So I'm going to *try* to do better this year!  I made a couple of pages of small notes on PPT - the first page just says "A Note from Mrs. ____", while the second page can be seen at the left.  I printed them on colored paper, cut them out, and now I have some notes to slip to students daily!

I would love some ideas for growth mindset / positive affirmations that wouldn't sound weird coming from your 40-something year old math teacher... any ideas? :)

If you want this file, click here.  You will need the Sunberry font


Made4Math #3 - Teaching Binder and Meeting Binder

I've already posted about my binders this week, but here they are all finished!

On the left is the meetings binder all bound with the small discs and a nifty little pocket that I made from a letter size page of cardstock.  Just fold it in half, cut at a diagonal, hole punch, and tape the bottom!

On the right is my teaching binder - isn't that cover just lovely?? :)  I added a nameplate and a couple of dividers and it's ready for the new year!


I know many of you are heading back to school this week, so best wishes on a new year!  :)